
.png)
.webp)


.webp)


.webp)


📌Bank remittance files can be a powerful asset for streamlining cash application in Oracle NetSuite ERP, especially when dealing with high volumes of customer or vendor payments. By importing remittance data and setting up matching rules, NetSuite can automatically align bank transactions with open invoices or bills, reducing manual reconciliation and improving accuracy.
Below is a step-by-step guide to help finance teams match payments with invoices using bank remittance files in NetSuite.
Steps to Match Payments with Invoices Using Bank Remittance Files
This process adds the bank transaction data to NetSuite, enabling it to be used in the matching process.
Step 1: Using Bank Reconciliation Feature (for statement data)

Go to Transactions > Bank > Import Banking Data
- Upload the bank statement file
- Use NetSuite’s Bank Statement Parser (SuiteApp) if installed.
- Transactions will appear under Match Bank Data for reconciliation.
Note: This is typically used for bank statement matching, not remittance advice.
Option B: Importing Remittance Files as Custom Records (for matching)
If you're handling remittance advice separately from bank statements (common in B2B), you need to:
- Create a Custom Record Type for Remittance Advice (if not already existing).
- Go to Setup > Import/Export > Import CSV Records
- Choose Custom Records > your remittance record type.
- Map fields like:
- Payor (Customer)
- Invoice Number or Memo Reference
- Amount Paid
- Payment Date
- Payor (Customer)
- Use Internal ID for customer mapping, as you mentioned (correct!).
Step 2: Set Up Matching Rules
Go to your Customer or Vendor records to define mapping logic.
- Create matching rules that reference values in the Payor or Memo fields from the imported file.
- These rules help NetSuite associate incoming transactions with the correct invoices or bills, especially when there's no exact match.
NetSuite uses these rules to suggest likely matches when the imported data isn't an exact fit.
Step 3: Match Bank Data
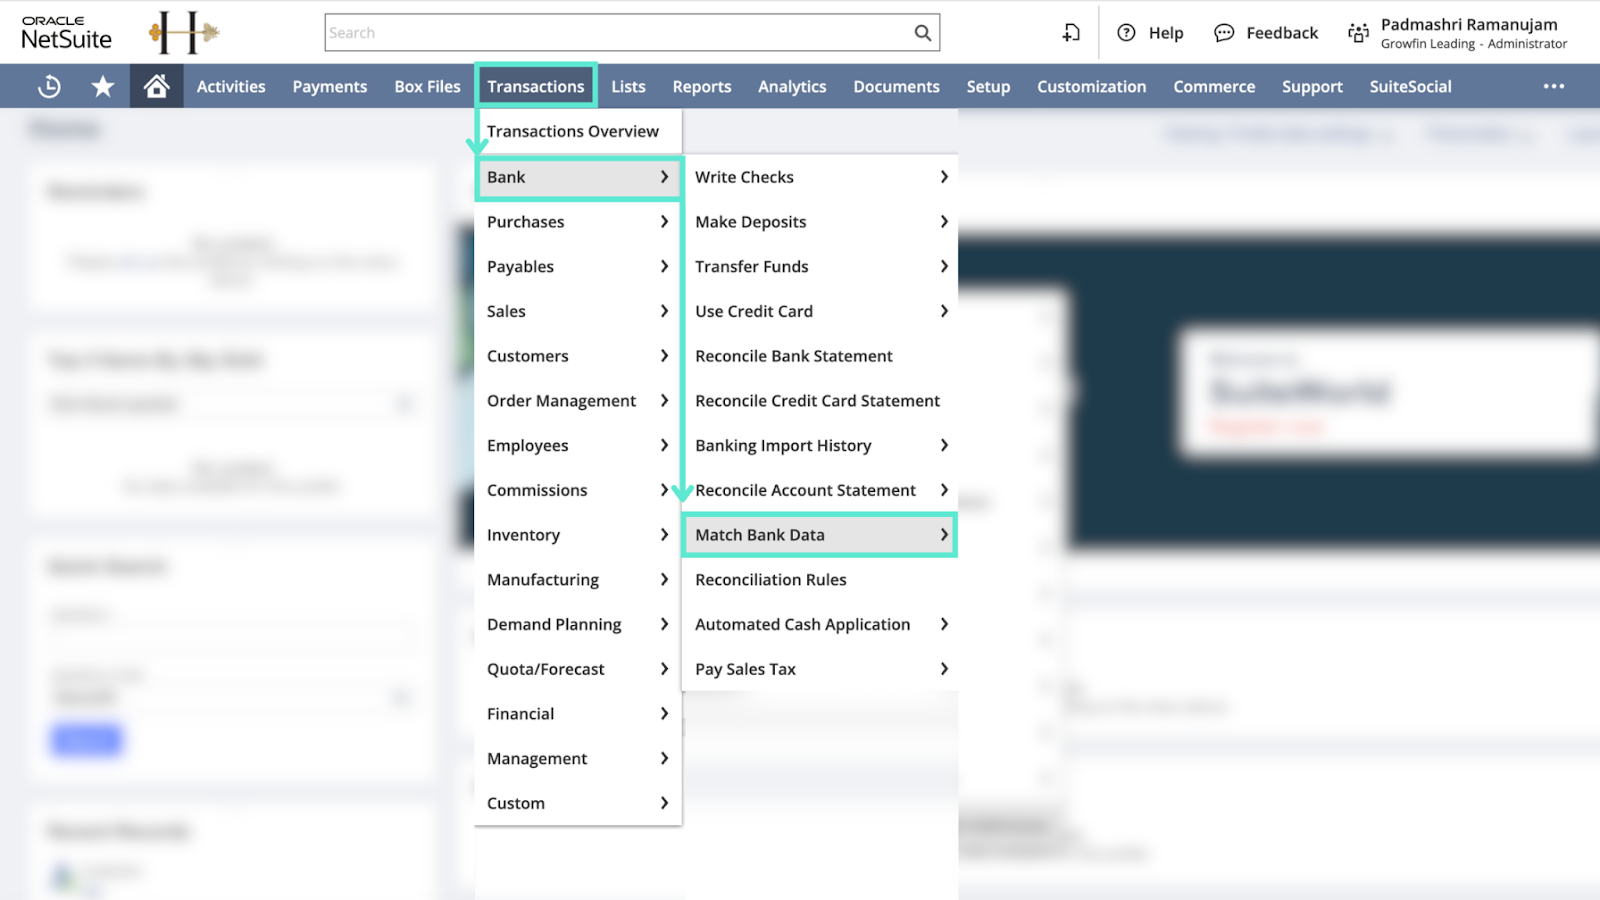
Go to Transactions > Bank > Match Bank Data
- Select the relevant bank account to reconcile.
- NetSuite will display the imported bank lines and try to match them with existing transactions in your system.
- Suggested matches may include open invoices, customer payments, vendor bills, or credits.
From here, you can approve matches, adjust them, or mark items for follow-up.
Step 4: Verify the Matches
Carefully review all matched transactions in the Match Bank Data page.
- Ensure that each match aligns with the correct invoice or bill.
- If something doesn’t match correctly, investigate the cause, whether it’s an incorrect mapping rule, a naming discrepancy, or missing transaction data.
While NetSuite automates much of this process, manual review helps maintain reconciliation accuracy and prevents downstream reporting issues.
Pro tip: While NetSuite streamlines payment matching, plugging in a solution like Growfin takes it to the next level. Growfin connects directly to NetSuite, auto-matches payments using remittance data even for short-pays and consolidated payments, and flags anomalies in real time. Hence, your collectors never miss a beat.


.webp)
.webp)
.webp)
.webp)