
.png)
.webp)


.webp)


.webp)


🚨 Problem: High-value or long-overdue invoices often slip through the cracks when follow-ups rely on manual tracking. By automating escalation inside NetSuite, you can ensure your team acts quickly on the most urgent receivables.
This guide walks you through setting up real-time escalation workflows using saved searches, workflows, and internal alerts.
Steps to Automate Invoice Escalation in NetSuite
Step 1: Create Saved Searches for Overdue or High-Value Invoices
Start by segmenting invoices based on age and amount. For example, you might want to track invoices that are 31–60 days overdue, more than 60 days overdue, or those with balances over $10,000.
To set this up, go to Lists > Search > Saved Searches > New

- Choose Type = Invoice
- Set Status = Open or Partially Paid
- Filter by Due Date = on or before [X] days ago.
Optionally, add a filter for Amount Remaining > 10,000. Save each search with a clear name like “Escalation – Over 60 Days” or “High Value Overdue.” These searches update in real time and act as the engine behind your automation.
Step 2: Build Workflows to Trigger Escalation
Next, you’ll use NetSuite’s Workflow Manager to define what happens when an invoice matches your escalation criteria.
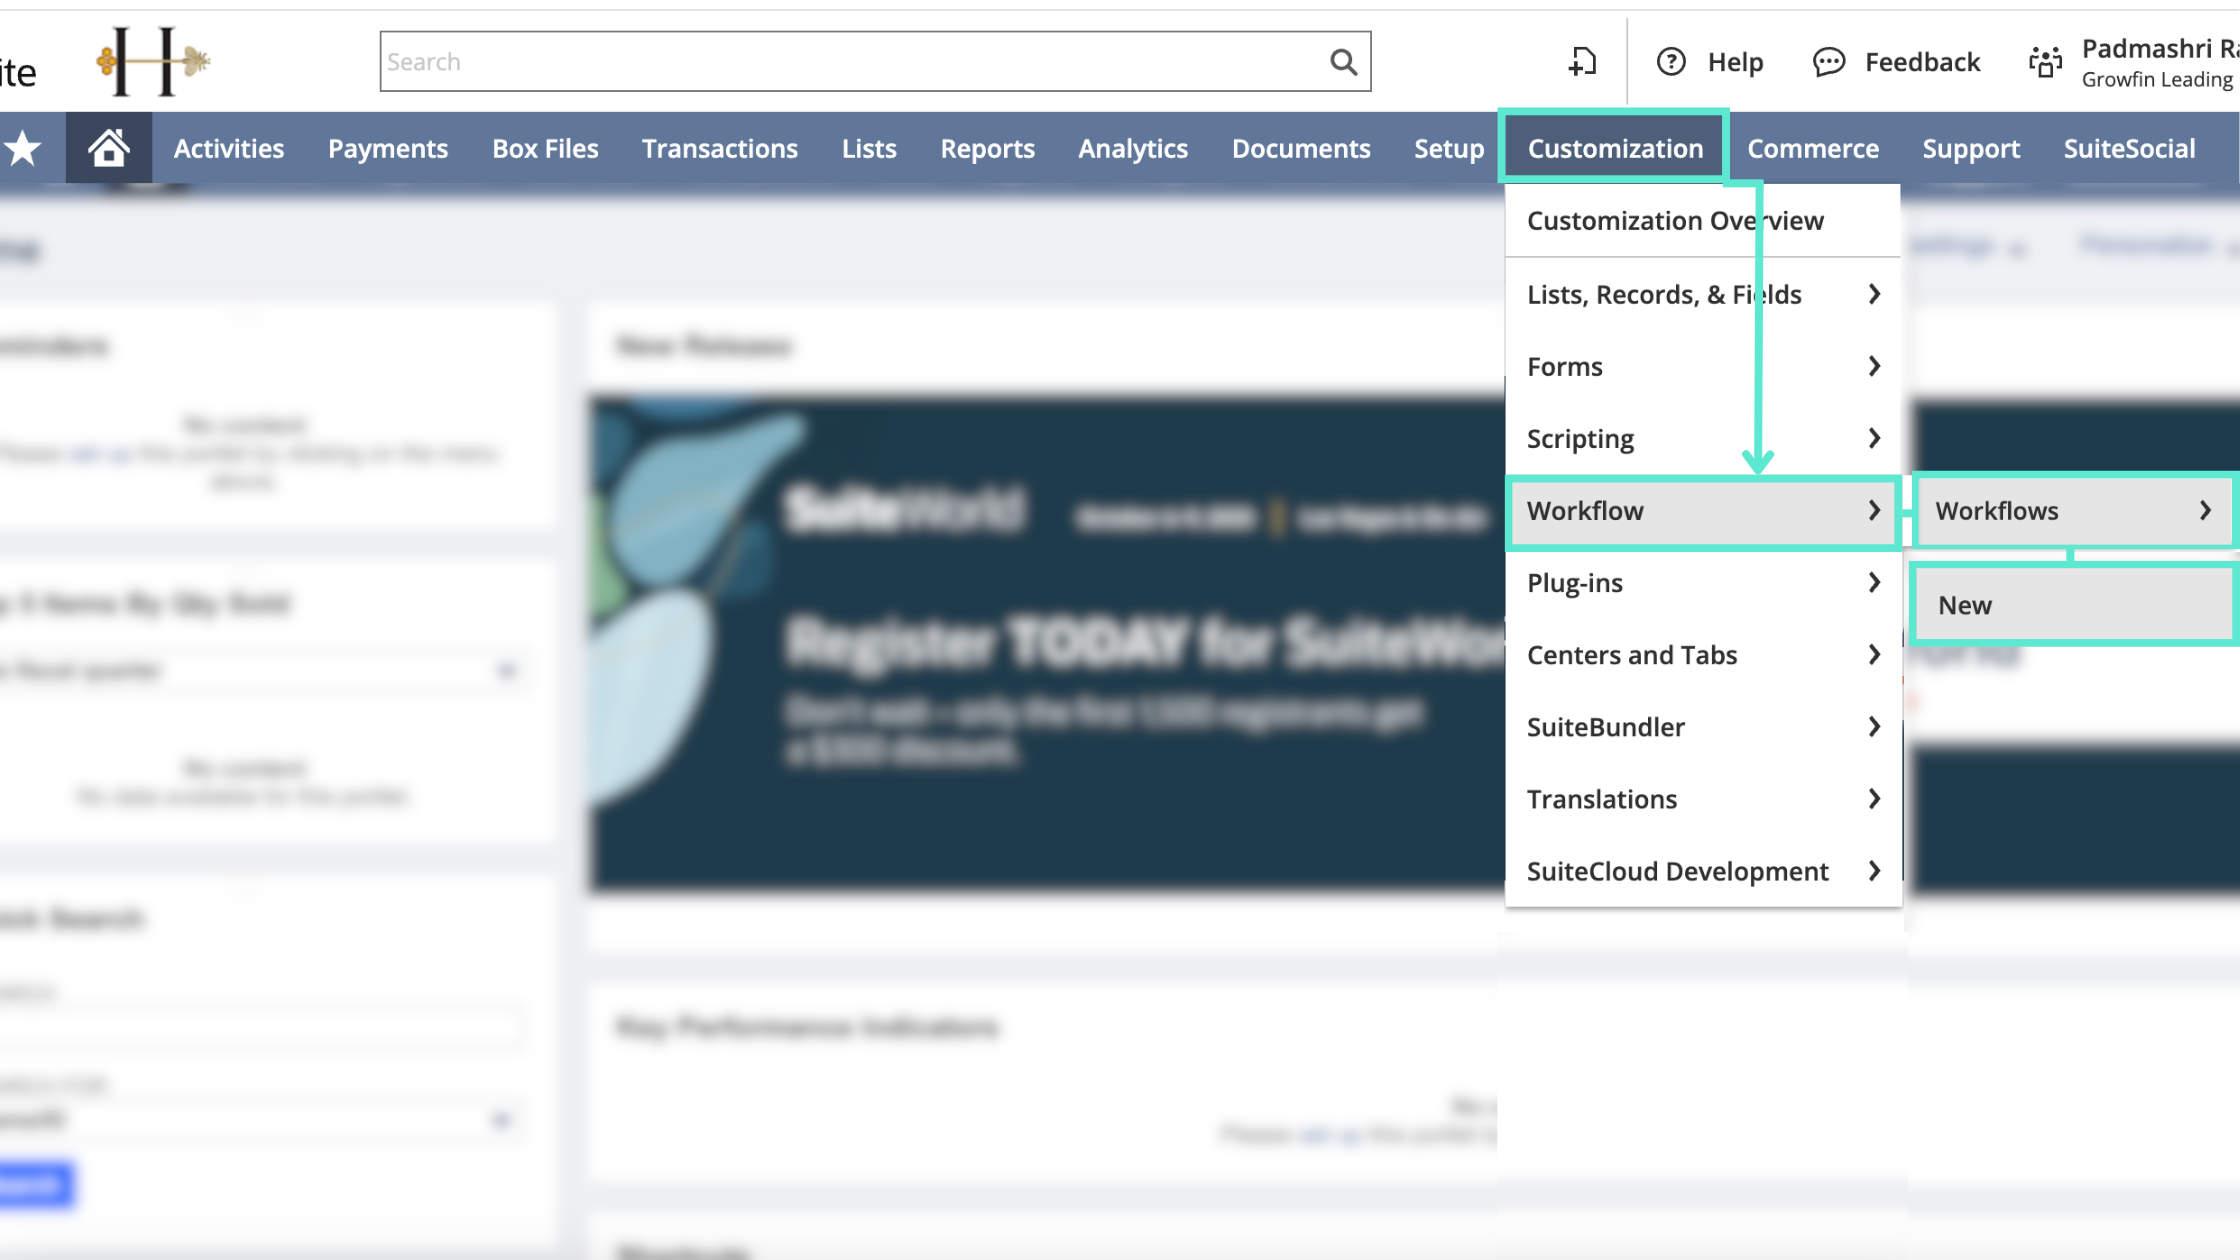
Go to Customization > Workflow > Workflows > New. Choose Transaction as the Record Type, set the Trigger Type to Scheduled, and run it daily. Use your saved search from Step 1 as the entry condition.
Inside the workflow, add these actions:
- Assign the invoice to a specific collector or escalation queue
- Send an internal notification email to your team
- Update a custom field like “Escalation Status” to track the invoice’s priority
This ensures invoices get routed and flagged without manual follow-up.
Step 3: Set Up Internal Email Alerts
Create a reusable email template to alert collectors or AR leaders when an invoice escalates. Include key fields like {tranid} (Invoice Number), {entity} (Customer Name), {duedate} (Original Due Date), {amountremaining} (Outstanding Balance), and a direct link to the invoice in NetSuite.
Send these alerts to the assigned collector or a shared collections inbox. It guarantees visibility and quick action on time-sensitive accounts.
Step 4: Track Escalated Invoices in Dashboards or Reports
Once escalations are active, bring them into daily workflows for monitoring. You can:
- Add escalated invoices to a dashboard portlet for real-time tracking
- Create a saved search filtered by collector to show their specific escalated cases
- Review all escalations during weekly AR meetings to ensure progress
This setup gives both individual team members and leadership full visibility into top-priority follow-ups.
Optional: Add Conditions for Strategic Accounts
To make escalations smarter, tailor your logic for different customer types. For example:
- Escalate enterprise accounts faster than SMBs
- Route accounts based on region, subsidiary, or collector specialization
- Add alerts when disputes are logged against already-escalated invoices
This kind of conditional logic ensures your most critical accounts get the right level of attention without delays.
And the best part? You can do all of it within your existing NetSuite ERP environment. This makes the escalation logic more aligned with your business.
Pro tip: Growfin integrates with NetSuite to auto-prioritize high-risk accounts, centralize follow-ups, and escalate faster without manual work.


.webp)
.webp)
.webp)
.webp)